
The timber floor was overlaid with plywood and a waterproofing primer before tiling, giving a stiff, stable base for the pattern.
Project overview
Retro pattern, modern installation.
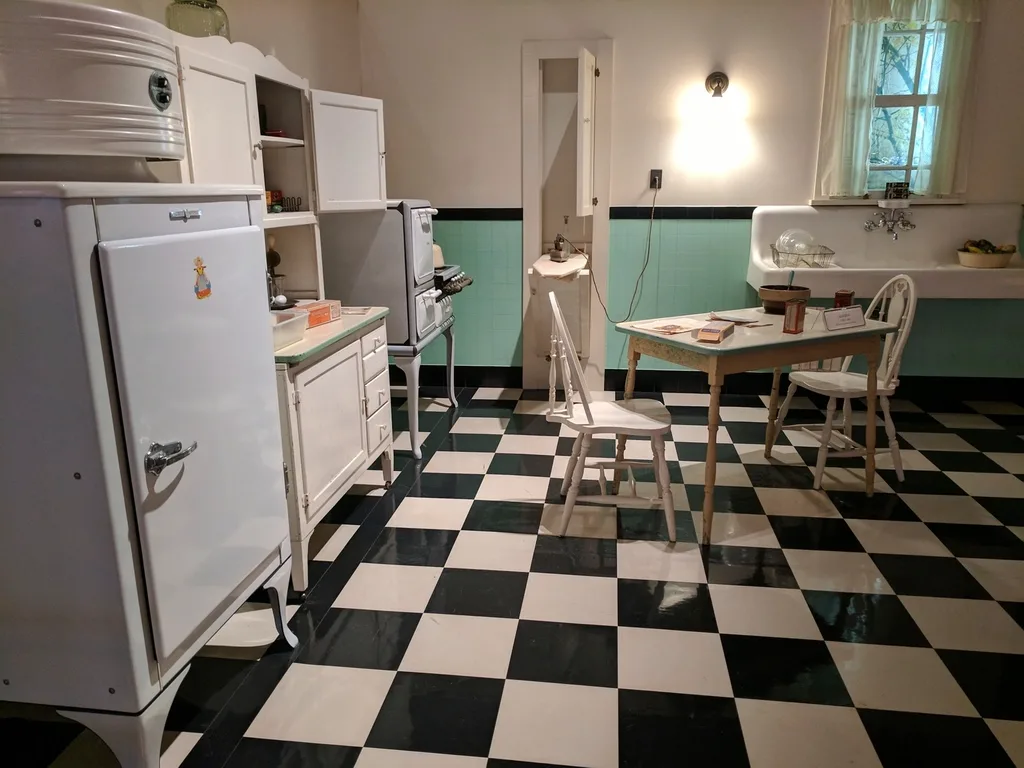
A black-and-white chequerboard floor in a 1950s cottage kitchen, set out so the pattern is square to the main doorway.
Project scope
- 01Black-and-white chequerboard floor
- 02Plywood subfloor preparation
- 03Pattern set from the doorway
- 04Threshold transitions
How the work is done
A controlled sequence, not guesswork on the wall.
Every stage is checked before the next begins — the finish is only as good as the work underneath it.
- 01
Assess the substrate
Check flatness, junctions, fixtures and wet-area readiness before the layout is committed.
- 02
Set out the complete room
Balance tile courses and control visible cuts, corners and transitions.
- 03
Fix and align
Maintain adhesive transfer, consistent joints and alignment across adjoining surfaces.
- 04
Finish and inspect
Complete grout, movement joints, silicone and a final cleaning check.
Project gallery
Overall view and installation details.
Photographs are shown in working order. Select any image to view it full screen.
Planning something similar?
Request a quote
Next projectPoint Chevalier patterned splashback↗